

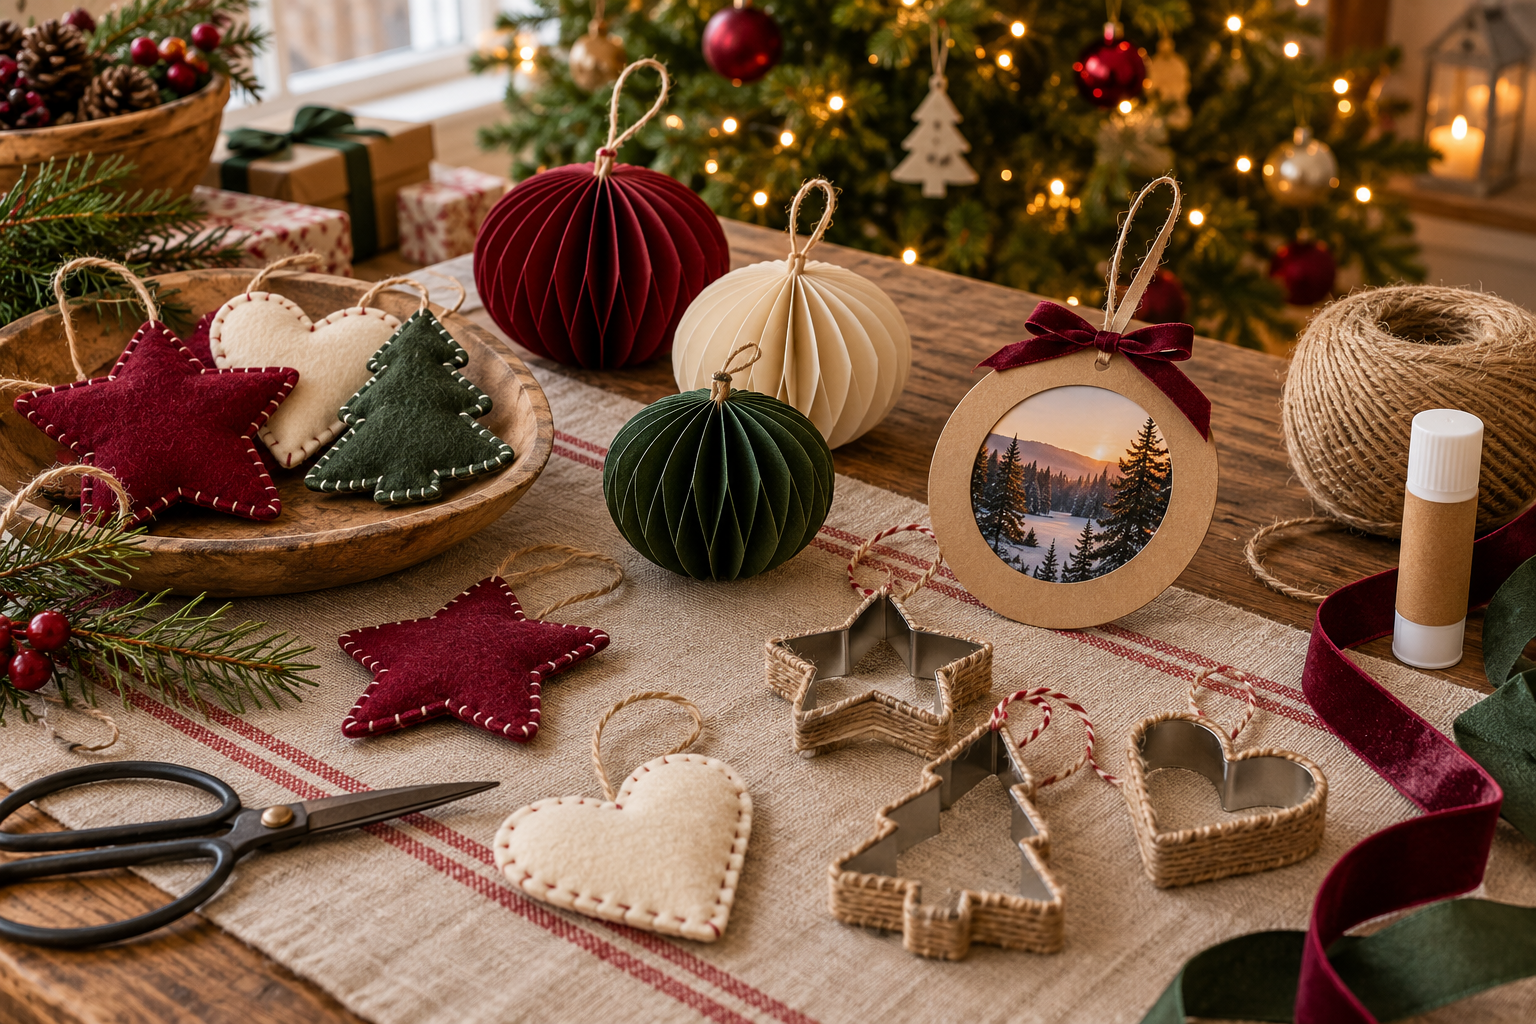
Christmas Ornament Ideas: Personalized Keepsakes and Simple DIY
These Christmas ornament ideas combine photo keepsakes with approachable DIY projects. You can make a whole set, choose one afternoon craft, or pair a purchased ornament with something you create yourself. The goal is a tree that feels like yours, rather than a collection of decorations that all look the same.
Choose a Story Before You Choose an Ornament
Think about what you want to remember when you unpack the ornament next year. A clear memory makes it easier to choose the image, color, or wording. You might use a family photo, a pet portrait, the year you moved, or a small symbol of a shared hobby.
Decide how the ornament will be used, too. A delicate keepsake may suit a protected branch or display stand; a flat paper ornament works well as a gift topper. Read the exact material, dimensions, hanging method, and care information before buying. Decorative ornaments are not automatically toys or suitable for unsupervised play.
Four Personalized Keepsake Ideas
1. A Family Photo That Captures This Year
Choose one picture that brings back a specific moment, whether it is a holiday portrait or an ordinary afternoon everyone loved. A small group with clearly visible faces is often easier to recognize on a small ornament than a crowded scene.
If you want a ready-made version, the photo ornament collection is a starting point for comparing designs. Check whether the particular item uses your photo directly or transforms it into an illustrated style. Names, dates, photo counts, and printing areas vary by design.
For a larger family, choose the clearest available picture rather than forcing a tiny collage. Keep any added wording short enough to remain readable, and use the year that belongs to the memory.
2. A Pet Portrait With Personality
Use a photo that shows your pet’s face clearly. A familiar expression can make a better keepsake than a heavily filtered image. Avoid busy backgrounds and photos where ears, noses, or whiskers disappear into shadows.
Match the design to the occasion. A playful portrait can celebrate a pet’s place in the family; a memorial ornament calls for a gentler message and the recipient’s preferences. Do not assume that someone wants a bereavement gift simply because they love animals.
3. A Baby’s First Christmas Memory
A baby’s name, the year, and a favorite photo can mark a first Christmas without filling the whole design with details. Check the spelling and the year carefully; the birth year and first Christmas year may be the same, but you should verify the intended wording.
Hang the finished ornament where small children cannot reach it, and keep ribbons, small components, and fragile decorations away from play areas. The ornament is a family keepsake, not an infant accessory.
4. A First Home or Shared Milestone
Remember a new home, a wedding, a graduation, or a trip with a simple image and one meaningful detail. A house silhouette, a landscape photo, or a short handwritten phrase can all work. Avoid putting a full home address on a publicly shared ornament photo if you would rather keep it private.
Create a consistent tradition by using the same color of ribbon each year. The ornaments themselves can change as your family’s story changes.
How to Choose a Photo for a Small Ornament
Before uploading a picture, check it at roughly the size it will appear on the ornament. A beautiful full-screen photo can become hard to read in a small circle or heart.
- Use the original file when possible. A screenshot may contain interface elements and less useful detail.
- Choose a sharp subject with enough light to see faces and important features.
- Leave space around the subject so a shaped crop does not cut off a face or pet’s ears.
- Check portrait versus landscape orientation against the actual design.
- Confirm whether you are ordering a photographic print or an artwork interpretation.
- Review spelling, year, photo placement, and the selected product options before checkout.
A photo collage is only a good choice if the exact design supports it and the images remain clear at the finished size. Do not assume every ornament supports multiple photos or printing on both sides.
Six DIY Ornaments to Make Your Own
Set out your materials before you begin and choose one project that suits your time and tools. Adults should handle sharp tools, needles, and heated glue. For a child-led craft, paper and glue-stick projects are easier to supervise than designs that rely on hot glue.
5. Twine-Wrapped Cookie Cutters
You will need a clean cookie cutter with smooth edges, twine, craft glue suitable for the materials, and ribbon.
- Secure the end of the twine with a small amount of glue.
- Wrap the twine around one section of the cutter, keeping the loops close together.
- Continue around the shape, then secure the final end and let the glue dry according to its instructions.
- Tie a ribbon loop around the top so the ornament hangs upright.
Leave part of the metal exposed for a lighter look, or wrap the whole shape for a rustic finish. If you use hot glue, an adult should apply it; a low-temperature gun can still cause burns.
6. A Felt Initial or Simple Shape
Choose a star, heart, tree, or initial that is easy to cut. Use felt, scissors, embroidery floss, a needle, a little stuffing, and a ribbon loop.
- Draw the shape on paper, then use it to cut two matching felt pieces.
- Decorate the front with a few stitches before joining the two pieces.
- Sew around the edge, leaving a small opening for a little stuffing.
- Close the opening and sew the hanging loop securely into the top.
Keep the shape simple and skip loose beads if they are unnecessary. An adult can do the cutting and sewing while a child chooses colors or draws the template.
7. A Folded Paper Fan Ornament
Use colored paper, a glue stick, scissors, and ribbon. Choose one or two colors to make a coordinated set.
- Fold two equal paper strips back and forth into matching accordion pleats.
- Fold each pleated strip in half and glue its inner edges together to make a fan.
- Glue the two fans together along their open sides to make a circle.
- Add a ribbon loop between the paper layers before closing the final join, then let the glue dry.
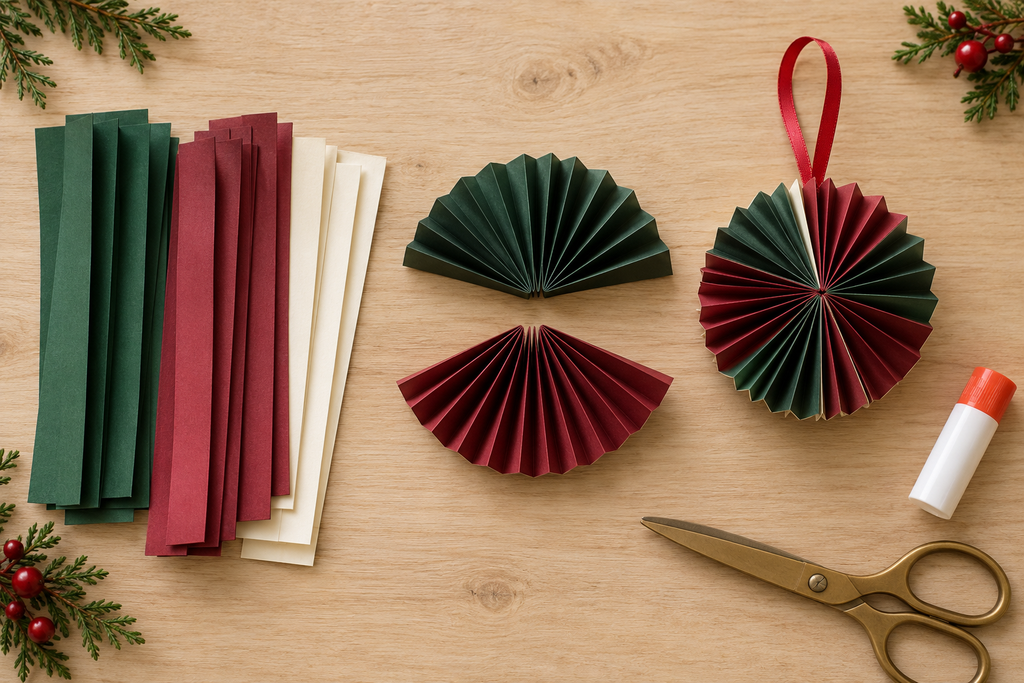
Test the loop gently before hanging. Small differences in paper length or fold width can change the finished shape, so make one sample before cutting a whole batch.
8. A Cardboard Photo-Frame Ornament
Turn a duplicate photo print into a lightweight ornament using two pieces of sturdy card, a glue stick, and ribbon.
- Cut a simple frame opening in one piece of card. Leave enough border to keep it sturdy.
- Place the photo behind the opening and check the crop.
- Attach the photo to the backing card, then glue the frame over it.
- Fix a ribbon loop between the card layers and write the memory or year on the back.
Use a duplicate print rather than cutting up an irreplaceable original. A landscape, pet photo, or small portrait all work when the subject is clear.
9. A Painted Wooden Disc
Start with a predrilled unfinished craft disc rather than drilling your own. Use paint suitable for the surface and a fine brush or marker.
- Sketch a simple design: a tree, a small house, a star, or a short name.
- Paint the background first, then add the detail after it dries.
- Follow the paint manufacturer’s drying and finishing guidance.
- Thread ribbon through the existing hole and tie a secure loop.
Keep the design bold and uncluttered. This is a decoration; do not assume a paint, finish, or surface is food-safe or suitable for a child to mouth.
10. A Handwritten Memory Ornament
Cut a star or circle from a sturdy card. Write one memory on the front and the year on the back: a favorite meal, a funny family moment, or a place you loved visiting. Punch a hole away from the edge and add ribbon.
This is a useful group activity because each person can make one ornament in their own words. Keep the message short enough to read, and let everyone decide how much they want to share. For more project choices, the DIY Christmas ornament guide offers additional craft directions to explore.
Mix Keepsakes and Handmade Pieces Without Overcrowding the Tree
Choose two or three colors for ribbons and handmade ornaments, then let photo keepsakes provide the variety. Place meaningful pieces where people can actually see them, and leave enough space that one ornament does not hide another.
Match the hanging point to the branch’s strength and the ornament’s weight. Secure loops, avoid placing decorations against heat sources, and check any electrical decorations according to their instructions. If pets or children can reach the tree, use display locations that reduce access to fragile or small pieces.
Turn an Ornament Into a Gift
A single ornament can be the main gift or a keepsake tied to a package. Put it in a protective box, cushion it so it cannot move, and add a note about the memory behind it. Do not let a decorative ribbon substitute for protective packaging.
For a seasonal gift you are mailing, check the specific item’s processing and shipping information before ordering. Leave time to inspect the personalization; this guide does not promise delivery by a particular date.
Store the Story for Next Christmas
Follow each ornament’s care instructions before putting it away. Let handmade pieces dry fully, separate delicate items, and avoid packing damp materials into sealed boxes. A small labeled compartment or individual protective wrap makes a collection easier to unpack.
Add a note about who made the ornament and why it mattered. Next year, that detail may be more valuable than matching every decoration perfectly.
Christmas Ornament FAQs
What makes a personalized ornament feel meaningful?
A recognizable memory and a small amount of carefully chosen wording. One clear image, name, or year is usually easier to understand than several competing details.
Should I choose a photo print or an illustrated design?
Choosing a photo print when preserving the original picture is the priority. Choose an illustrated style when you enjoy an interpretation of the image. Read the exact listing and review the available preview before ordering.
Are all ornaments printed on both sides?
No. Printing areas and customization options vary by product. Check the item you select rather than assuming a category-wide feature.
Which DIY project is a good place to start?
Try the handwritten memory ornament or cardboard photo frame if you want a small project with few tools. Choose the felt ornament when you have time for sewing, or the paper fan when you want a coordinated set.
Can I mix store-bought and handmade ornaments?
Yes. Use a shared ribbon color or a repeated shape to connect them. A few personalized keepsakes and a few simple handmade pieces can make the tree feel collected over time.
Let Your Tree Tell Your Story
Choose a memory, make or select an ornament that captures it, and add the details you will want to remember next year. Whether you start with a photo keepsake or a piece of folded paper, the most meaningful decoration is the one that belongs to your life.